30 June 2018

Brief medical hiatus

I've been futily staving off an ingrown toenail for about 3 months. It was finally too much to bear, and I got an appointment with a podiatrist on Friday to implement a lasting fix. So no work at KnArrow Haus on Saturday, but I am planning to go up Monday and Tuesday to put a ribbon on the ABS drainage plumbing.

Here's the carnage/fix:


26 June 2018

Pre-purchase render of siding

Trying the siding colors on for size before taking the plunge of purchasing. Constructed in Sketchup. Rendered using Enscape 2.3.


Anything you recommend I change or reconsider?

24 June 2018

Planned siding detail

I'm going to try to get siding ordered this week so that I can begin on it in July. 

I had some inspiration mid-last week, and am planning to put a Swiss cross on the East side. The body of the siding will be either galvanized or light silver/gray. The cross will be darker gray. Around the door will be wood -- not sure what kind/color yet, but something natural. The siding on the upper floor in the front (South) will be dark gray Hardie panel.


The hole in "the beam" - A leap of faith

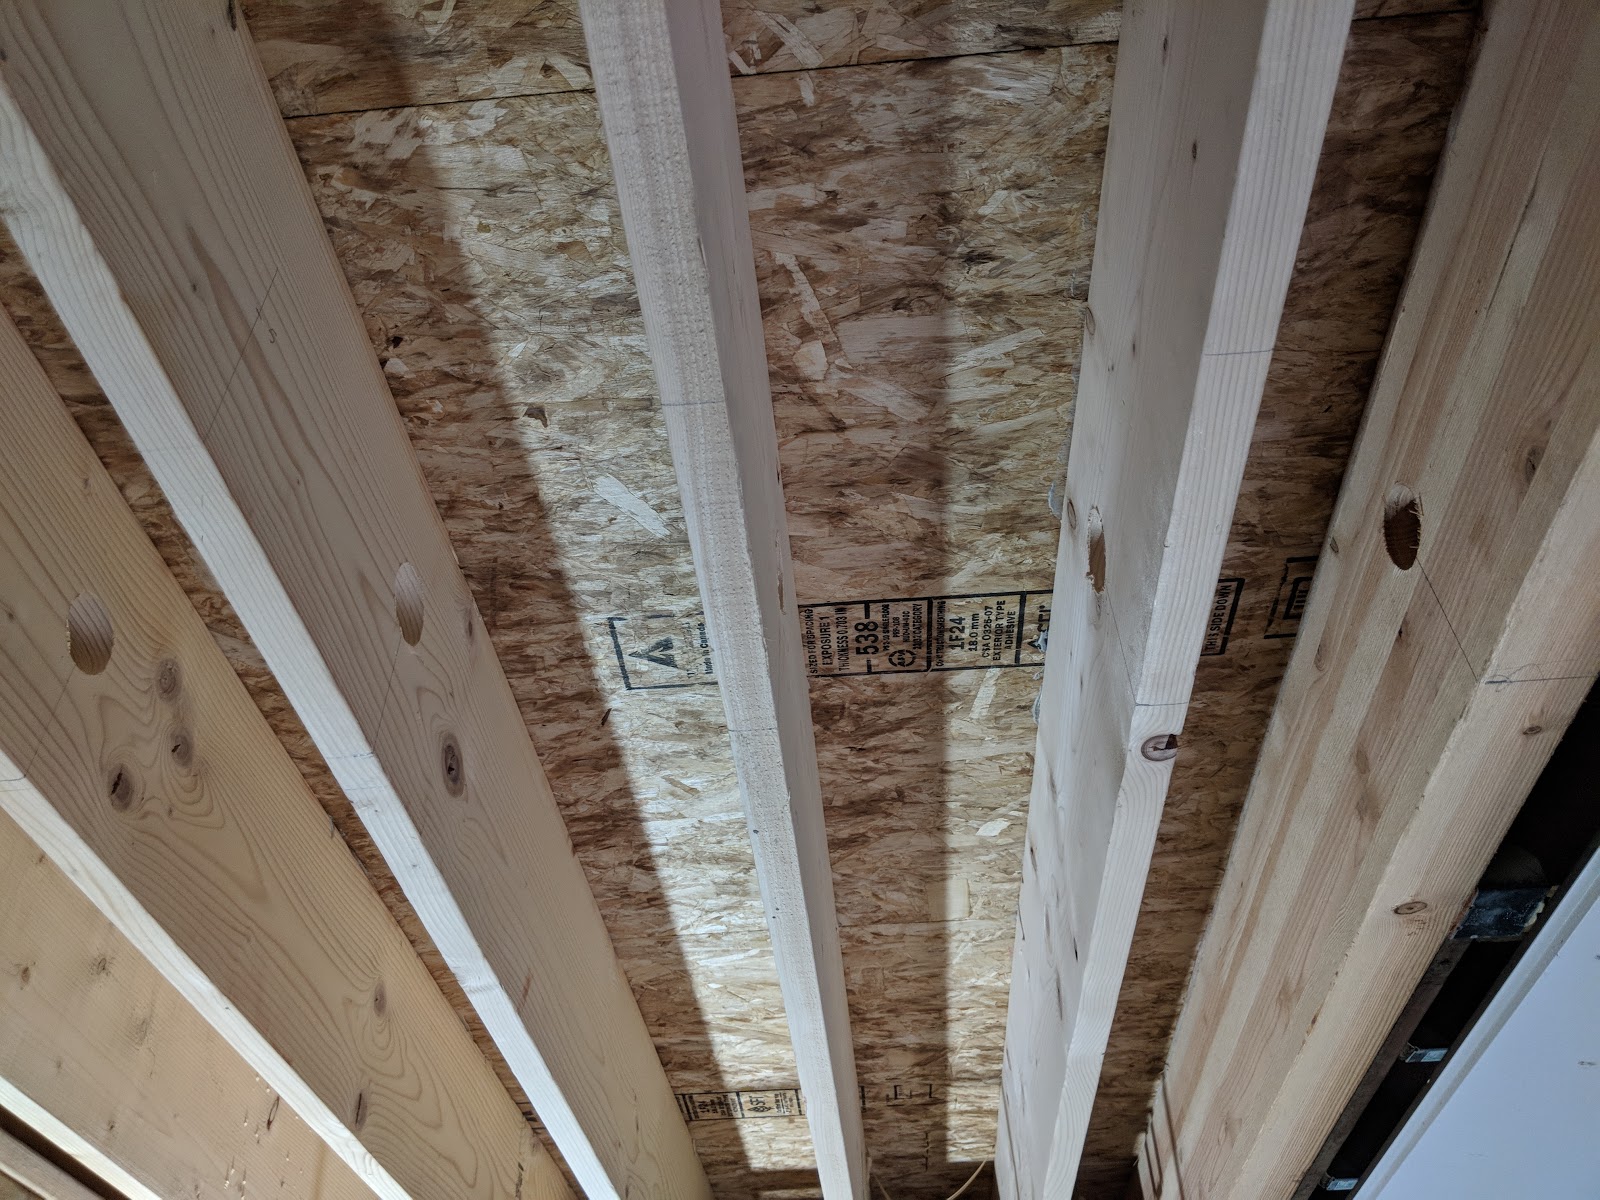
Last weekend I left the Haus having measured two different scenarios for routing the main level powder room's sink drain to meet up with the plumbing stack. I have to go *through* one of the large (4x12) glulam beams -- no options for over/under/around. But to maintain 1/4" per foot slope on that run, I was having trouble getting my measurement to meet up at the right level with the toilet's 3" drain, which also needs to maintain the same slope.

When I returned this time, I remeasured once again and decided that if I took the 2" run through the joists at 1/8" per foot, it would *probably* meet the 3" run at pretty-close-to-the-right level.  (When drilling through glulams, there are some "rules", which are essentially only put small holes in the middle third (horizontally and vertically) of the beam.)

"Measure twice. Cut once."
"You can't undrill a hole."
Lots of inner monologue.

After a few more minutes in "The Thinker" pose, I came to terms with the fact that no amount of thinking, analyzing, measuring, marking or inner monologue was going to result in that plumbing run actually becoming "done." I would have to take a leap of faith and actually *drill the hole* in the beam.

Since the beam is 4" thick and my hole saw bottoms out at about 2", I had to cut the hole half way, then chisel out what had been cut, then continue with that process a couple times to get all the way through.  About 20 minutes, lots of sawdust, and sore shoulders later, the result is pictured below.

The hole in "the beam".

Holes in the rest of the beams for routing the 2" sink drain from the main floor powder room.

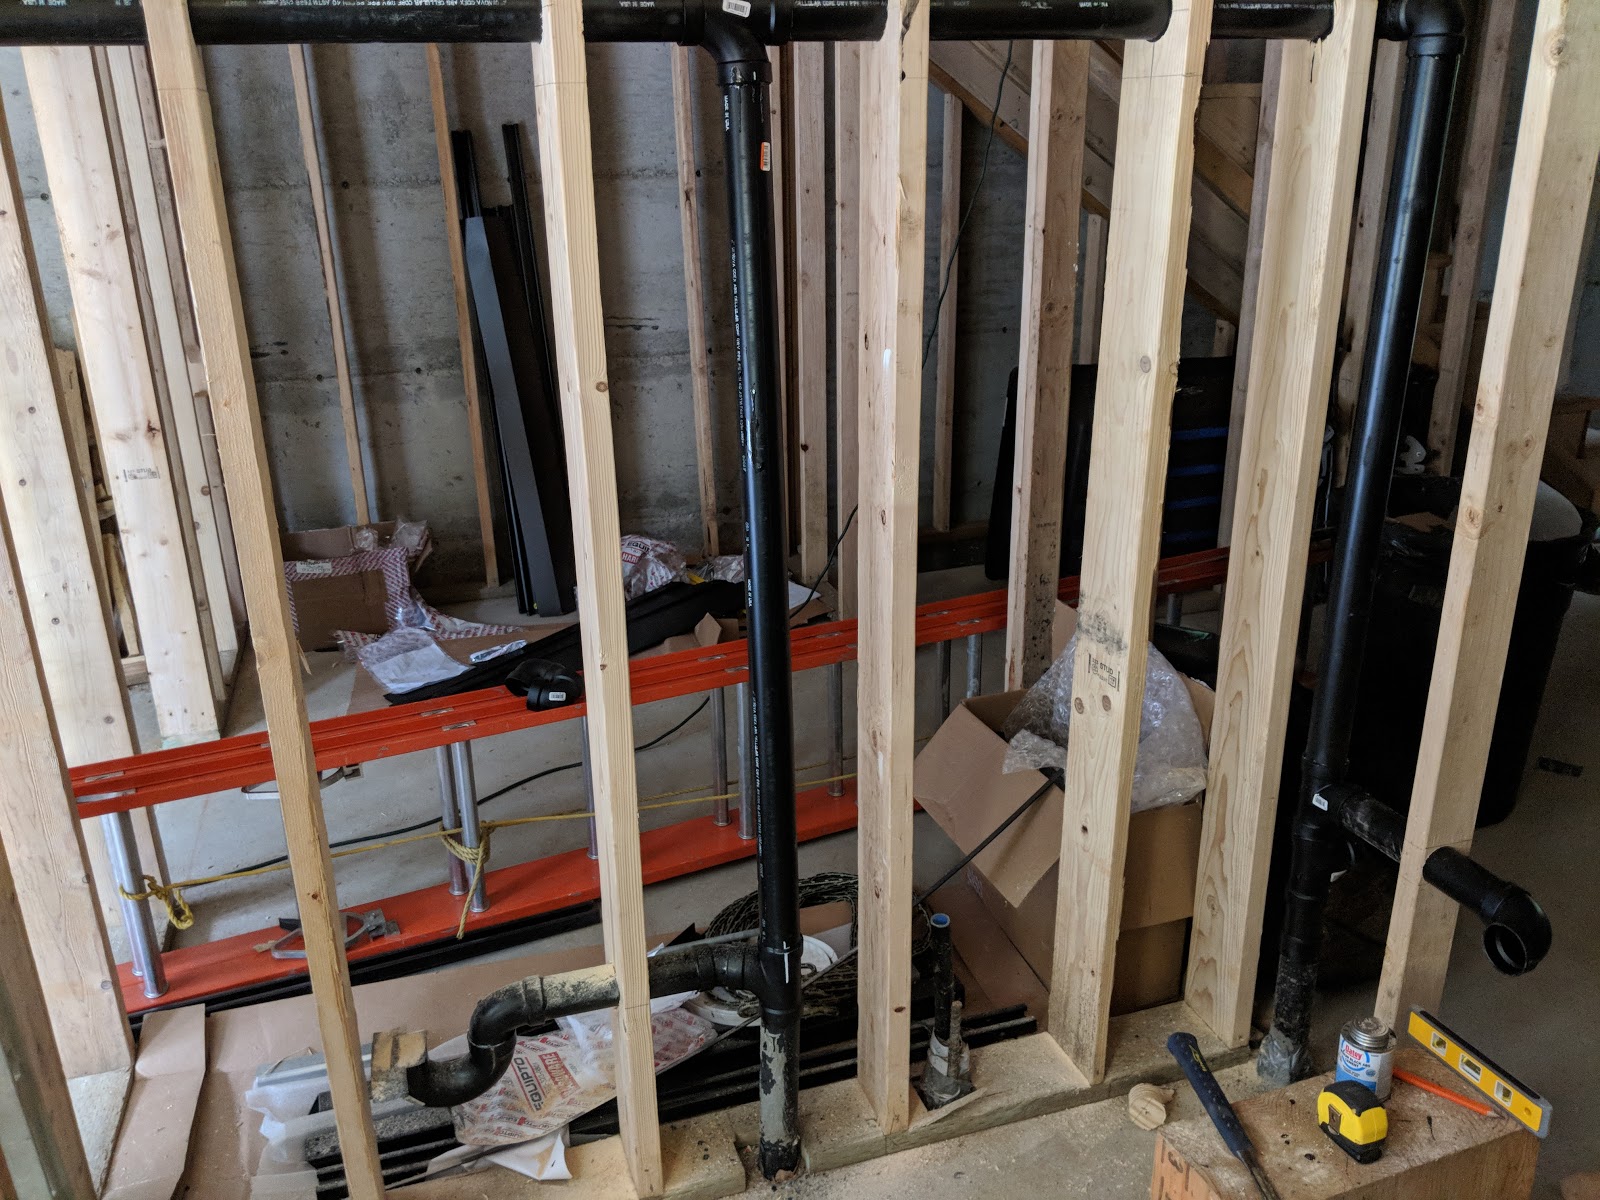
The 2" drain fully installed. (Well, mostly. I haven't glued the pipe going through the joists because I need an ABS fitting that will join the 2" pipe in to a 3" long-turn elbow.)

Full view of the 2" drain. 

This is the origin of the 2" drain run: The sink drain in the main floor powder room.

I was counting on my "helper" arriving mid-afternoon to help with glue-ups between floors. But our daughter had a second basketball game yesterday, so my helper had to stay with her. Another solo weekend. 

I turned my attention to finishing up, as much as possible, the downstairs plumbing runs and vents.

I completed the sink drains for the bathroom and the wet bar, including the vent which meets up with the washing machine P-trap.

My day ended about 8pm. 

17 June 2018

Measuring twice: Siding + basement plumbing

Spent a beautiful Saturday at the Haus (except for one rain squal deluge). The snow is all but gone.


The carpenter ant sprayers were up in the neighborhood, so I had them add us to the list. And I'm glad I did.  Look what I found (below) when I ventured on to the adjacent lot.

A very big ant hill about 50 feet from the Haus.

I got all the holes drilled for the plumbing run coming down from the upstairs. These pieces are just loosely fit so I can keep track of the fittings.  I couldn't glue them up yet because I need a helper standing on the floor above to help push and twist.

I was able to glue up the trap for the washing machine. Also drilled the holes for the sink drain vent (not visible off to the right) but couldn't hook it up because I need a T-fitting with a vent out the top.

I spent most of my time measuring where holes need to be drilled through joists so that I can run the powder room sink drain and hook it up to the toilet drain (through 3 joists), and then run it through 3 more joists so that it meets up with main stack -- all of this while maintaining 1/4 per foot slope.

The problem I ran in to is that I'm supposed to NOT drill holes through joists in the top 2" or bottom 2". I ran into violations in the rule as I charted things out. Lots of up-and-down latters measuring and marking joists. Before drilling any holes through joists I conceded defeat, deciding I'd come back with a fresh mind and someone else to consult with. Remember, "You can't undrill a hole."

Remembering that maxim, I also took some second measurements on the exterior structure for the siding. I lifted a 26 foot off my mother and brought it up to the Haus so that I could get an actual measurement on some of the wall heights instead of relying solely on counting panels. 


Using the measurements, I've created a hyper-accurate rendering in Sketchup to help me figure out paneling measurements.

I'm planning to put corrugated metal siding on all the faces except the upper floor on the front and around the front door. I've started getting bids for this brand of siding. Still trying to determine if I do 26 gauge or spring for the 24 gauge.


And I have to finalize the color still. Opinions on color?

07 June 2018

Mid-week special - fireplace, siding measurements, & more plumbing

I met the fireplace installers on Wednesday morning. They extended the chimney an 2 more feet above the roof and added a metal plate around the chimney where it goes through the underside of the roof to trim it out and improve appearance. They also installed the final faceplate on the fireplace and made sure it was working properly.

Also, the chimney cap was bent to one side because of the snow load on it over the winter -- didn't even last the first season. They bent it back, but acknowledged they'll need to come up with a more durable solution before next winter.
That's a LONG way up. The 40' ladder is fully extended.

If you look carefully, you can see the metal bracket around the chimney under the eve.

Faceplate installed with fire underway. I kept it going for about 4 hours. Even without the thermostat and fan hookup, it throws off some serious heat.

While the fireplace workers were there, I took the time to get more official measurements on the exterior of each side of the Haus as I plan for flashing and siding. The pictures below show my chicken-scratch measurements along with a picture of the corresponding face of the Haus.

 
South side (front)

West side

 
North side

 
East side

I spent the remainder of the afternoon in the basement drilling holes for the plumbing stack for the upstairs drain lines to meet up and flow to the septic system. I ended up outrunning the Milwaukee holehog's ability to charge the batteries, so I took a break once and then called it a day about 4:30 pm.
The plumbing runs from upstairs will meet up in this horiztonal (1/4" slope per foot) 3" pipe and meet up with the vertical feed to the septic system.

The hole carcasses on the basement floor.

As I walked around the Haus taking measurements, I noticed a few interesting "issues" as shown below.

There was a mosquito pond in the back area being fed by our miniature glacier, so I dug a trench to drain it.

This is an *extremely* hardy sprout of some kind coming up right at the edge of the East foundation wall.  I could not pull it out, so I clipped it (but felt a little guilty as I did so.)

02 June 2018

Hit stride plumbing ABS

Made good progress on the drainage plumbing today. The upper floor is essentially "plumbed," except for the vents, which I'm doing last.

The above picture shows the shower p-trap connecting up to the sink drain, and then running through the joists and over to the wall. Getting all these fittings and pipes hooked-up and with the right slope.

I decided to route all of the runs down the 1st floor wall. They'll converge in the basement wall below.  I got the holes drilled through the bottom plate, but ran out of 3" fittings.

ABS glue is pretty sticky/goopy when wet, but it peels off easily after it dries, even off of clothing (for the most part).

The snow has melted enough that I was able to drive all the way to the cabin. The 2018 construction season is officially open.