13 December 2020

Endgame Stairwell Trim

Mackenley decorating the basement Christmas tree.

During our mid-week and weekend work trips to KnArrow Haus, we focused on finishing the trim around the stairs and stairwells. Every piece is custom cut, usually with multiple measurements and angles to get everything to line up. Lots of trudging up and down between the stairs and the saw in the garage. 
Added trim along the underside of the stair stringers because
we had to cut the drywall back when mounting the staircase.

Tolerances on the top side the stair stringer were close enough that I was able to caulk the gap.

We used the same birch plywood that's on the ceiling
to trim out the floor joists in the top floor stairwell. 

I used the blue pine to trim out the framing
and floor joists on the bottom stairwell.

We cut our 12 foot long 4"x10" piece of blue pine in half.
One piece will become an entryway bench. The other piece might
become our fireplace mantle.

I installed our T-Mobile Home Internet router upstairs Tuesday evening. It's truly unlimited -- no such thing as overages. (A must when teenagers with social media visit.) For $50/month and without any upfront payments or long-term commitment, they sent me a router that I only had to plug in. Signal strength is just ok, and the speeds aren't awesome, but they're better than the currently-unavailable DSL, the only hardwired option in our little mountain community. Hopefully it'll work out. To-date, I've been rationing our use of a mobile router connected to Verizon that throttles to ridiculously slow speeds after 20GB.

Panorama view to the North on Saturday morning from the master bedroom.

06 December 2020

Beginning of the Endgame

A beautiful, bluebird day for working on KnArrow Haus doing what can only be characterized as the endgame. 

In the Wintertime, a mountain to the Sourth shields the cabin from direct sunlight
starting early afternoon, even though we have daylight until early evening.

View from the inside.

Mackenley digging in the snowbank created by the roof shedding.

Started off the workday with a gimme: Installing the microwave. We've been using a cheapo-temp microwave during construction that will now be relegated to the basement. I searched high and low, long and hard to find a black stainless steel that was 18" wide or narrower. They don't exist. This LG model that is _exactly_ 18" wide and has a 1000 watts of power. 

The next order of business was far less glamorous. I applied another coat of epoxy to the drain trough and pipe flange in the bunk bathroom sink -- don't want to take any chances with it leaking (again) after my first failed attempt at repair. (Really annoyed that a sink that expensive wasn't perfect out of the box.)  

Sorry, no pics. 

With Katie's help, I mounted the sliding door track for the bunk bathroom.

Mounting the track for the sliding bathroom door.

I did a lot of measuring, planning, and remeasuring to make sure the wheels on the track would clear the perpendicular vent pipe; and so the door would also be at the right height for the opening. Not too high. Not too low. Just right. 

Because the framing is a little off inside the wall and the track crossed the opening at the top of the doorway, I had to drill an extra hole in the metal track. But I'm good at drilling through metal after my experience with the stair railing.

With both sliding door mounted the next order of business was installing the handles.

Handle on outside of sliding door

Handle on inside of sliding door.

The final accoutrement to the sliding doors is the door guide at the bottom to keep the door from swinging in and out.

Sliding door roller guide

Final task for the day was installing the toilet paper holders.  I bought these on Etsy a few weeks ago.

Basement bathroom

Main floor toilet room

Bunk bath toilet room

Master bathroom

As we were packing up last night to come home, Mackenley came running in, crying with blood on his tongue. He learned the hard lesson that a cold metal railing is NOT a good place to lick off the frost.

Tongues and metal railing don't mix.
(Note the "shiny" patch on the railing seasoned with tongue skin.)

02 December 2020

Overachieving Olaf

Olaf's been working overtime during this La NiƱa year. Here's where we're sitting in terms of snowfall heading in to Winter 20/21. 


Here's what it looks like on the ground.


30 November 2020

Crawling to the Finish Line

Many assume that an occupancy permit means "done".  

Nope. 

An occupancy permit means only "this building is safe to occupy," that the county inspector's job is done. It does NOT mean our project is done. 

It's been nearly a month since my last post on the occupancy permit. Why the gap? In my final, *simple* task to achieve inspector compliance, I...

  • Threw out my lower back. (A lower back injury in my teenage years usually resurfaces at the least-convenient times).
  • Visited the chiropractor and got things stable and mending.
  • Foolishly, moved a heavy couch a few days later to the basement causing me to throw out my back again, worse.
  • Visited the chiropractor again.
  • Promptly contracted shingles (probably due to the back injury plus the stress of prep'ing for the final inspection.)
The shingles have sucked my energy. It's been a slog to get to the cabin and work productively on the final projects. But we need to close out the construction loan in early December. 

So without further ado, here's what we've been up to:

Floating Shelves in the Kitchen

Purchased four 10 ft. long 8/4 rough sawn Alder planks
 between 10" and 12" wide from Crosscut Hardwoods in Seattle.

Cut and drilled each piece to fit on the wall supports installed last Winter.

Stained and sealed the shelves.

Temporarily removed the vent pipe and installed the shelves.
(The wall tape marks where I will put set screws
 in each shelf to secure them to the wall brackets.)

Reinstalled the vent pipe through the holes cut before finishing.
(I removed the vent hood and routed everything up from below.)

Plumb Bathroom Sinks

Connecting the sink drains to the bathroom sinks was simple enough. But the big sink in the bunk bathroom leaks around the drain fitting.

<sigh> Buy some plumbers epoxy.

Plumbers epoxy in the drain slot around the drain pipe fitting.

My initial attempt has been only marginally successful. Still leaks.
I'm planning to apply some more epoxy in the trough and
around the drain pipe fitting this coming week.

I also learned a hard lesson that, thankfully, occurred while we were there. Katie saw water dripping from the main floor ceiling. I quickly turned off the water and went to investigate: One of the wall mounted faucets in the bunk bathroom had popped off. I realized that I had not seated any of the four faucets correctly. After ensuring each faucet was set all the way back against its rough-in fitting and tightening the set screws, we turned the water back on.

Thankfully the ceiling panels were easily removed. We allowed everything to dry out for a day, then reinstalled the panels. No harm. No foul. But a royal pain and time suck. 
The DIY plumbing school of hard knocks

Converting Bathroom Vanity Drawers to Door 

Had I been thinking clearly, I would have asked the cabinet makers to make the drawers in each drain pipe bay to function like a door. I was not thinking clearly.  I had to convert the drawers into a single, hinged door.

Drain plumbing in toilet room sink.

The drawer fronts on the left converted to a hinged door.

The bunk bathroom sink before converting the right drawer bay in to a door.

The bunk bathroom right bay of drawers converted to a door.

The master bathroom cabinet drawers removed.

Finished master bathroom cabinet.

Electrical Bits & Bobs

The upstairs hallway lights Katie ordered from China finally arrived.

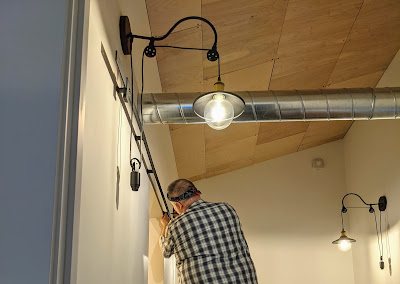
We removed the temporary rough-in lights and installed these last weekend.

We haven't been able to get the fireplace blower fan to turn on.
I checked that there's power to the switch and even bypassed
the switch to no avail. Now I need to pop off the front of the 
fireplace to see if power is actually reaching the fan.

Downstairs Decor

The couch on the left is the on that demolished my back. 
The rugs arrived last week.

The 75 inch keystone to the basement cabin experience.

The sofas make out in to queen sleepers.

Essential movie room accoutrements

Master Bed & Bath


Mounted the sliding barn door this past weekend.
(Sammie is blissfully indifferent.)

The master bathroom only lacks a mirror and towel bar now.

Done, not pictured

  • Internet is coming from a hotspot in the bunkroom room window connected to the Verizon network. It gets throttled after 20 GB/month. T-Mobile Home LTE will be providing the permanent Internet in the same location.
  • Google Wi-Fi mesh is covering all three floors with Wi-Fi. So easy to setup and manage. Covers every floor wonderfully.
  • All the Lutron Caseta smart switches are programmed. I have to say, it's pretty handy to be able to see and control every single switch and fixtures in the house from my smart phone from anywhere in the world. The only "dumb" items are the ceiling fans and the fireplace blower (which doesn't currently work). 
  • Installed a Simplisafe alarm system. Loving the info it gives me as well on the temperature at the water manifold, the status of power, and general peace of mind.
  • Katie completed most of the caulking to seal the walls and floor. And most of the touch-up painting as well. 

An evening dinner trip to Leavenworth

Still to do

Towel bars, toilet paper holders, some trim around a couple doors and the stairs, some built-in shelves in bathrooms, a couple of door handles to install/adjust, a little siding above the garage door, some exterior trim on the basement door, and some facing trim on the edges of the concrete floors to cover the exposed edge of the rough flooring, and probably a few other things I'm forgetting.

23 October 2020

Certificate of Occupancy!

Finally received our certifiate of occupancy Friday morning.

KnArrow Haus's long-awaited Certificate of Occupancy

We also passed our final/finish electrical inspection this week, on the first try.

It was a bit of an ordeal to finally pass inspection. I scheduled both inspections, the electrical and the county's building inspection on Tuesday.  Only the county showed up on Tuesday. L&U showed up Wednesday, but thankfully passed us without anyone there. 


The county inspector asked me to resolve 4 items, and said if I would email pictures of the corrections, he would go ahead an issue the certificate:

  1.  The ends of the downstairs railings needed to terminate in to the wall.


  2. I was missing one switch plate cover.

  3. I needed to install the inside ventilation covers in the toilet rooms, showers, and utility room.


  4. And we're required to have 4" high house numbers visible from the street. (These are definitely temporary -- I'll do something more stylistically in keeping in the spring.)

I drove up and made all the above corrections and took pictures on Wednesday evening.  Then, even after providing the pictures, there was still some back-and-forth with the inspector, requiring another trip up on Thursday evening, during which we delivered another matching, sleeper sofa to the basement.

On Monday evening, we also completed the bunk bathroom light fixture:

Later Monday evening, while wiping down the shower I threw-out my lower back. Got to the chiropractor on Wednesday, and then promptly threw it out *again* Thursday evening. A fitting end to a week of passed inspections.  I'm convalescing my back this weekend as snow pours down in the passes.

Even though we've passed the legally required inspections, we still have a fair amount of work to do. 
  • Hook-up the range and dishwasher
  • Hook-up bathroom sink drains, which will require turning some cabinet drawers into cabinet doors.
  • Install floating shelves in the kitchen and kitchenette
  • Backsplashes for the range and bathroom sinks
  • Caulk the baseboards on all three floors
  • Touch-up paint on all the walls
  • Hang the barn doors for the top floor bathrooms
  • Bathroom mirrors and shelves
  • Install a few more door handles
  • Paint front and back doors.
  • Fireplace mantel