30 August 2020

Blitz Week: Ordered Glass, Countertops and a Smaller Bathroom Cabinet

Most mornings this past week were spent picking up miscellaneous supplies and finding contractors for bathroom glass, kitchen counters and a re-do on the downstairs bathroom vanity.

Bathroom Glass Ordered

For the shower room, we ordered a satin etched ("frosted"), frameless shower door.

For the downstairs corner shower, we ordered a farmless clear glass enclosure.

They will come to measure on Tuesday, and glass should be installed about a week later. We definitely went over budget...

Kitchen Countertops Ordered

We are going with Quartz for the countertops in the kitchen and downstair kitchenette. We chose the Cambria "Annicca Matte" quartz to go with the cabinets and concrete floors.

Cambria "Annicca Matte" quartz with our sample cabinet door

I expect they'll come measure/template in the coming week, and installation will be about 2 weeks later.

Re-ordered Basement Vanity

In January, I ordered a vanity with sink from Costco. It has been sitting in our garage until we brought it up last weekend. 
Elbe Rustic 36" Single Sink Vanity by Northridge Home
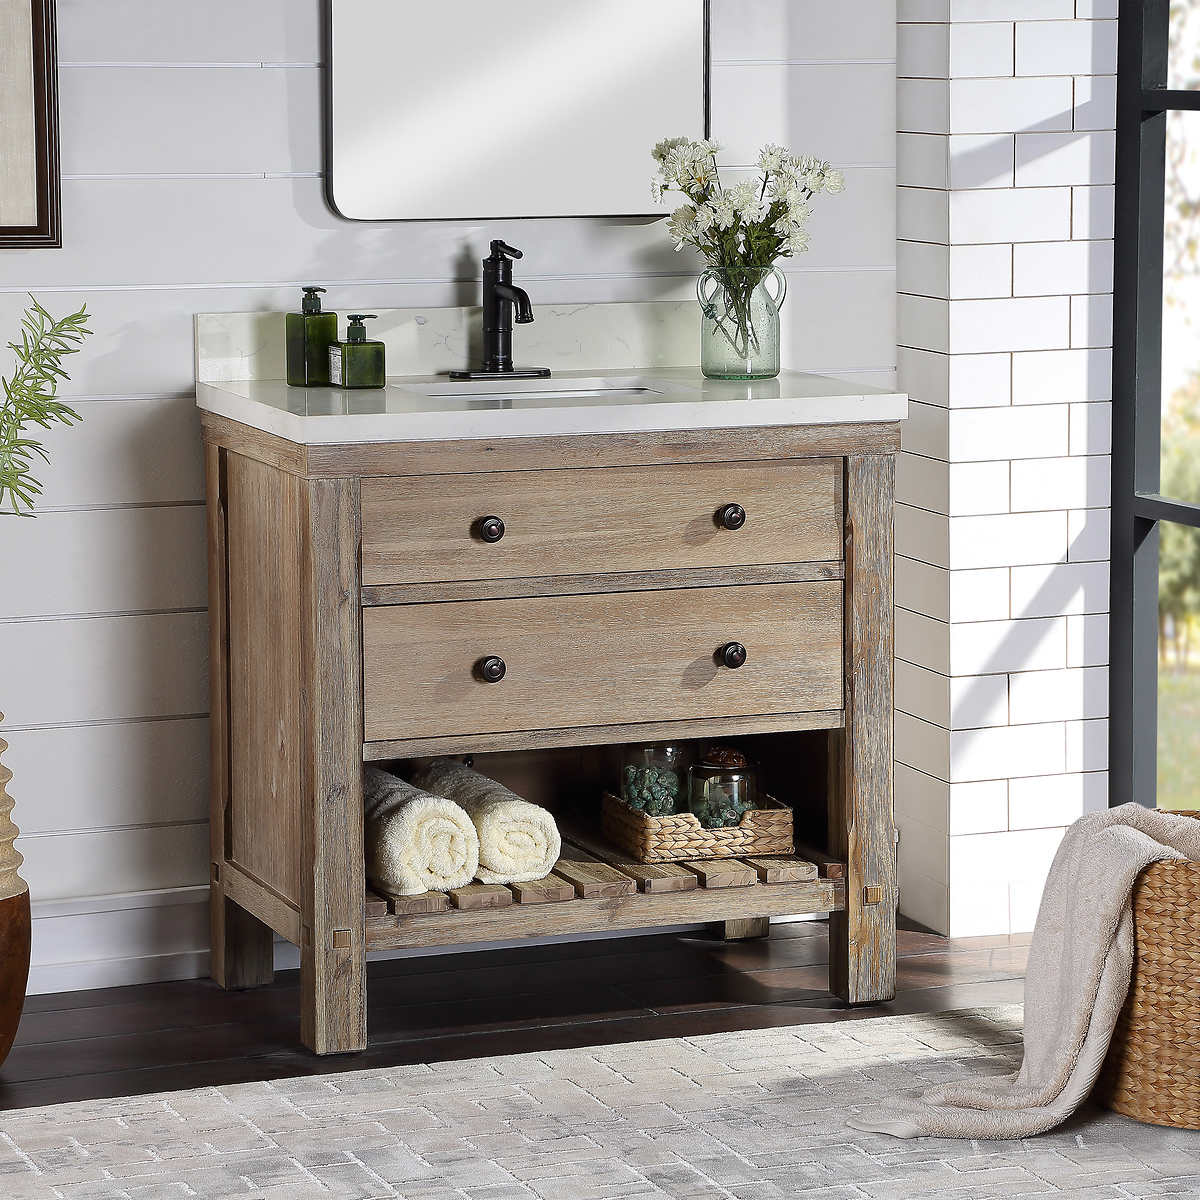
Elbe Rustic 36" Vanity

We realized early in the week with a tape measure in-hand, that it was going to be too deep -- too little room to go between it and the shower in order to get to the toilet. Sigh. Thankfully, Costco has generous return policy. We ordered this vanity 2 days later from Wayfair. It's only 15" deep. Should arrive next week.

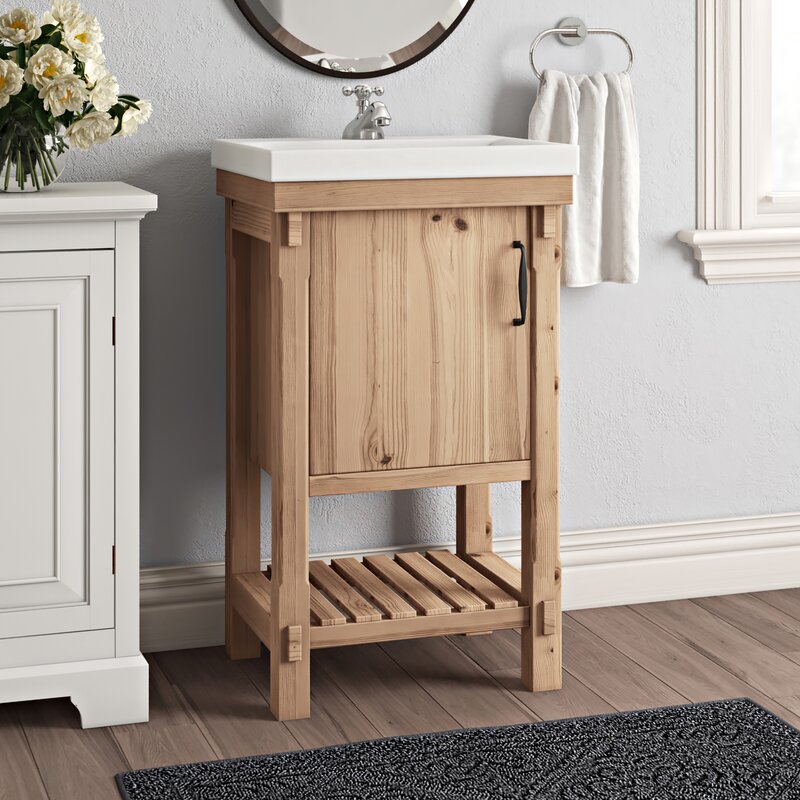
Whitten Rustic 20" Single Bathroom Vanity Set


29 August 2020

Blitz Week: Top Floor Ventilation

Friday and Satuday were devoted to top floor ventilation. On the top floor, I have a single, very quiet, 360 cfm fan mounted in the toilet room. On the "sucking" side of the fan, spiral pipe removes air from the shower room, from a tee in the master bath, and from a tee in the toilet room. The blowing side goes out the side wall on the roof's high side. 


Ventilation fan 4" tee in the master bathroom.

The ventilation fan termination in the shower room. 

Ventilation fan in the toilet room. Sucking side on the left. Blowing side on the right.

Blowing pipe exiting the toilet room on the right and exiting the exterior wall on the left.

That little dot above the window? It's the exterior cap to the top floor ventilation system. 

Blitz Week: Ipe on the Shower Room Ceiling

On Tuesday evening, Katie and I started installing the Ipe wood on the shower room ceiling. Abbie and I finished it up that evening. 

Ipe on the shower room ceiling.

Fallout after drilling holes for the ceiling lights.

Take-aways:
  • I'm too cheap to buy top-grade Ipe, so it took some appreciable effort to straighten out each piece as it was mounted. Did the ceiling for $150 instead of nearly $500. Worth it.
  • Broke the bit to the hole saw. Ipe is tough stuff.
  • The hole saw jumped around on me a little. Got most of the cosmetic damage out by sanding.
  • Lots of sawdust. Be prepared. Get the shopvac.
For good measure, here's the basement shower progress by the tile guy. (Still needing grout.)


Blitz Week: Toilet Trouble

I took the entire week off work, and we spent 6 straight days at KnArrow Haus attempting to get things far enough along to have a clear view to the finish line -- the final electrical and occupancy inspections.

Everything takes longer than planned, attributable to various combinations of naiveté, cockeyed optimism. inexperience, and stupidity.

DAY 1

We opened the first of four identical toilet boxes only to find a black, 2-piece toilet -- not the white one-piece toilets we had ordered. Returned all 4. Grumbled. 
Left: What we ordered. Middle: What we received. Right: What we ended up with.

DAY 2

Picked up 3 in-stock toilets at Big Box store and hauled them back up to the cabin. Due to some irregularities in my plumbing roughin last year, poor selection of toilet rough-ins, and inexperience, the flanges were set too high and the bolts slots were out of place. I bought several different solutions intended to fix the out of place bolts slots, but any solution would add too much height to the flange. Head scratching. Returns at the Big Box store. 

DAY 3

Overnight inspiration on how to deal with the rough-in flanges that are a little too high: Cut notches with my oscillating multitool in to the sides of the toilet flange rings to receive the toilet bolts. I used the new waxless toilet rings that allow you to reset the toilet as many times as needed. Nice. Placed the toilet in the main floor water closet. Hooked up the supply hose. Turned on the water. Squirted in the face by a faulty supply hose. Mop-up. Luckily, I bought an extra hose. Second supply hose worked fine. Caulked the bottom of the toilet with silicone. Same process with the master bedroom toilet. But it rocked after setting it, so it had to wait another day for some plastic shims and caulk to cover them.

DAY 4

Shimmed and caulked the master toilet. Rock solid. Works great.

Prolog

I'm waiting to set the toilet in the upper floor toilet room because I need to get a ladder in that small toilet room to run the sprial pipe for the ventilation connecting the shower room, master bath, and toilet room; and to hookup the relay switch for the upper floor heating. 

I'm waiting on the bottom floor toilet until the tile guy is done grouting. And, we realized early in the week that we had some space issues in the downstairs bathroom, so we needed to refigure sizes before purchasing the toilet.

Now, I just need to remember that I don't have to pee in the bushes anymore. Old habits die hard. 

23 August 2020

Heavy Lift Moving Day

Since early this year our garage has been filling up with large items for the cabin -- 4 vanities, 2 very heavy concrete sinks, 4 toilets. Our entry way has been collecting light fixtures, light switches, spiral pipe for ventilation, and other miscellaneous odds and ends. (The UPS guy is beginning to wonder about us.)

Bryan and Greg showed up with Bryan's job trailer Saturday morning, and I borrowed a friend's panel truck.  We loaded everything in to the truck and trailer. 

Getting everything loaded in to the cabin wasn't too bad a chore. 

Bryan and Greg hauling up the main floor concrete sink for the toilet room.

The main floor powder room vanity and sink went in without too much of a hassle.

Everything went great UNTIL....the beast. The nearly 6 foot wide concrete trough sink destined for the top floor was nearl the end of my heroic friends. I'll let the video speak for itself. 

Can't say enough about how amazing it is to have strong, competent and experienced workers help out for a day. Can't say enough. 

For this disinclined to watch the video, here's the final result of their gargantuan effort.

Top floor main bathroom vanity and and trough sink.

After we got the sinks install, we got the main floor kitchen cabinets and the bottom floor kitchenette cabinets installed, and ready to receive counter tops. Of course, I completely forgot to take pictures of these because as soon as we finished, Katie showed up with a great bit sectional for the main floor from the Dania warehouse. I'll post pictures of the kitchen in the next day.

Sylvie enjoying the new sectional!

Tomorrow starts my planned "Blitz" week. Taking desk-job PTO to devote a full 6 days to the cabin to attempt to get within striking distance of calling for a final occupancy inspection.

17 August 2020

Grand Staircase

I'm going to let the video speak for itself on this one. We did this all in a few evenings and 2 full days last week. 

Really grateful to Norm and Paul and Trent and Sylvie and Katie for all their work and patience and persistence. This is a major step toward the finish line for KnArrow Haus.

Building and installing the grand staircase in KnArrow Haus

Norm cutting the stringers

Cutting out the kerfs for the treads.

Sylvie chipping out the kerfs.

Making sawdust.

The mess.

The stringers waiting to be sealed.

Assembling the stringers Friday evening.

The maleable washers have been sitting in the cabin for 3 years...waiting.

Paul manhandling the staircase.


Katie and Sylvie sealing the remaining treads.

Sylvie power-tooling the treads in place.

Mackenlie taking a turn at the power tools.

Partially assembled.

Fully assembled.


Glad to get rid of that rickety temp staircase.


13 August 2020

Showers, Chimneys, Can Lights and Stairs

 Big day at KnArrow Haus. Three different subs onsite.

The shower/tile contractor is making smashing progress. Very pleased with the shower room progress. While we were there, he also completed the floor in the shower room.


The fireplace contractor came to finalize the repair on the chimney and install a snow hood to prevent future mishaps like we experienced last winter. 

Katie, Mackenley and Sylvie installed the can lights on the basement and first floor.

Sylvie and Mackenley unpacking and assembling the can lights and trim.

Katie installing the can lights and trim.

Norm and Paul were onsite to mark and cut the stair stringers.


After Norm and Paul departed, Katie, Sylvie and I worked on kerfing out the spaces for the stair treads in the stringers. 

Sylvie representin' with her wood working skills.


Huge MESS.

After kerfing and breaking out each tread, I took a router to them and cleaned everything up.

Tomorrow we will clean-up the beams and treads with a sander. Then seal them and get them bolted in to the risers.

09 August 2020

Sanded. Stained. Sealed.

After the debacle of last Saturday's floor sander rental _attempt_, we ended this week with two coats of sealer on our sanded and stained concrete floors. It required 6 straight days of persistence, fortitude, and effort.


Katie rolling the sealer on the concrete floor

On Monday afternoon I returned to our local Big Box rental department and retrieved the floor sander with _all_ the necessary accoutriments. 


Katie and I made a terrible mess sanding all three floors, from top to bottom. 

It's difficult to comprehend how much dust is generated by a concrete floor sander. Cleanup sucked -- sweeping and vacuuming. Lots of it.


Acquired a few battle wounds. That sander if very torquey -- it took a while to get the hang of it.

After spending all Tuesday evening cleaning-up Monday's mess, we realized we would need to mask off the bases of all the walls and doors prior to staining. And after spending Wednesday on our sides and stomachs masking off the walls, we also knew we'd need to mop and dust the floors before sealing them. 


Masked off all the walls prior to staining.

On Thursday, I met the shower/tiling contractor on site in the morning to get him oriented. Then drove home for a day of office work. 


Niche in the shower room completed and the shower pan started.

Shower pan in the basement begun.

Shower floor tile.

On Friday morning, I ventured to Cadman and asked them to recommend a concrete floor sealer. 

To be safe, I purchased two 5-gallon buckets of floor sealer. 

I'm grateful it was a water-based sealer, because with an oil-based sealer we would have needed respirator masks which are now IMPOSSIBLE to purchase due to Covid-19.

After all our clean-up work, I had what seamed like a brilliant idea to rent a power mopper to get the rest of the dust up with minimal effort.  ...another trip to the Big Box rental department.


The power mopper fit successfuly in the back of Katie's car, but was a bust. 

I spent almost an hour trying to figure the power mopper out Friday evening. Watched their YouTube videos twice. The machine just wouldn't reliably spit out water, or reliably clean it up. I put it back in the trunk of the car, got the regular old mop from the garage and spent a couple hours mopping the floors Cinderalla-style. 

Saturday was seal-the-deal day. Before beginning with the sealer, we spot checked all the rooms to scrape a restain spots and areas that had gotten drywall mud on them that was lifted by the sander earlier in the week. I sacrified one of my woodworking chisels, which worked wonderfully to scrape down to raw concrete, but it will now need some major sharpening before it's useful for wood again. A quick restain, which dries in 15 minutes. Katie dusted the floors in each room once again, and I came behind with the sealer and a 3/8" nap roller on a stick.


The first coat of sealer took about 2 hours to apply. We took an early dinner and river to 59er Diner for fish-and-chips to allow the sealer to dry.  For the second coat, I did the pouring and Katie did the rolling. After 2 coats, we still have about half of our first 5-gallon bucket of sealer left. 

We pulled away at 8pm feeling very satisfied. (Although, due to a bunch of tile supplies sitting on the basement floor, there are, technically, still a few areas that will need to be sealed after he's finished.)

Lessons Learned

  • If it's your first time using a rental tool, make sure they give you *everything* you need. Have them show you how to use it.
  • Let go of the trigger when the floor sander gets away from you. Bruises heal themselves, wall dents don't. (Sorry, Katie.)
  • It's not possible to spray a floor near a wall without spraying the wall. Just plan on masking stuff off. (Sorry, Katie.)
  • Sprayed stain bounces off floors. Be careful which way your spray head is angled or you're gonna be repainting. (Sorry, Katie.)
  • Don't rent a floor mopper -- regular mopping is far less effort and lots cheaper. RENT a really good concrete dust vacuum.
  • Thank God EVERY DAY for Katie.